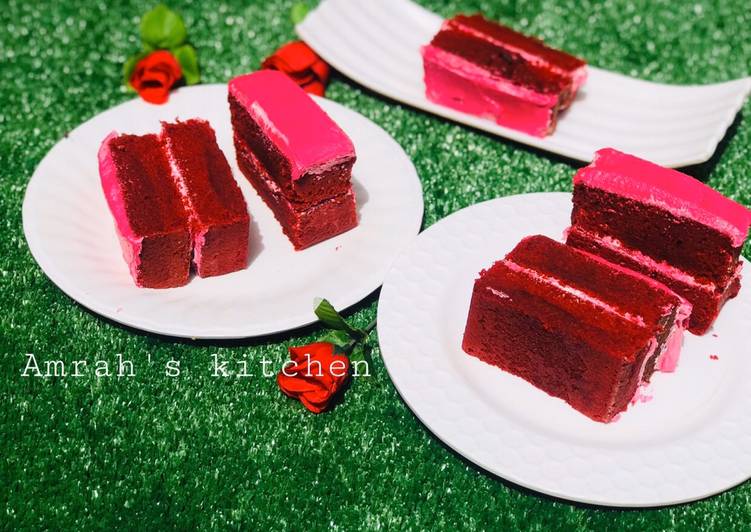
Red velvet cake. This Red Velvet cake was definitely not what I expected. It could be that I have no experience with Red Velvet cake but with this recipe the cake was much to heavy. The Icing was bland and honestly tasted like flour.
 Nowadays most cocoa powders are alkalized, as in stripped of acid.
Look for a non-alkalized one for this old-fashioned recipe.
Completing the classic look is a coat of bright white ermine frosting, cooked the old-fashioned way.
You can cook Red velvet cake using 19 ingredients and 14 steps. Here is how you cook that.
Nowadays most cocoa powders are alkalized, as in stripped of acid.
Look for a non-alkalized one for this old-fashioned recipe.
Completing the classic look is a coat of bright white ermine frosting, cooked the old-fashioned way.
You can cook Red velvet cake using 19 ingredients and 14 steps. Here is how you cook that.
Ingredients of Red velvet cake
- You need 1 of and 1/2 cup flour.
- Prepare 2/3 cup of sugar.
- Prepare 2 of eggs.
- Prepare 1 cup of buttermilk.
- Prepare 1/2 cup of vegetable oil.
- Prepare 2 tablespoons of cocoa powder.
- Prepare 1/2 teaspoon of baking powder.
- Prepare 1/4 teaspoon of baking soda.
- You need 1/4 teaspoon of vanilla flavor.
- You need 1/4 teaspoon of chocolate flavor.
- You need 1/4 teaspoon of milk flavor.
- You need 2 teaspoons of red food colouring.
- You need Pinch of salt.
- It's 1/4 teaspoon of white vinegar.
- Prepare of Whipping cream.
- You need 1 cup of whipping cream.
- Prepare 1/4 cup of chilled milk.
- Prepare 1/8 cup of cold water.
- You need 1/4 teaspoon of vanilla flavor.
In a large bowl, sift together the flour, sugar, baking soda, salt, and cocoa powder. This is the recipe to make red velvet cake, i have to say after so many years of baking this is a r star rating. Red Velvet Cake Recipes Don't wait to indulge in a slice of red velvet cake, a homey classic treat that calls to mind Mom's best baking. Try one of these, our most popular red velvet cake recipes.
Red velvet cake step by step
- Here's the ingredients needed.
- Whisk the flour, baking powder, baking soda, cocoa powder, and salt together in a large bowl. Set aside..
- Whisk sugar and oil untill well combined. Add eggs, buttermilk and white vinegar and mix well..
- .
- Add in the flavors.
- Add the dry ingredients into the wet ingredients.
- Beat in your desired amount of red food colouring just untill combined. I used 2 teaspoons..
- The batter will be silky and slightly thick..
- Divide the batter between 2 loaf pans, bake for 30-35 mins or untill the top of the cakes spring back when gently touched and a toothpick inserted in the center comesout clean. If the cakes need a little longer as determined by wet crumbs on the toothpick, bake for longer..
- In a large bowl, using a handheld mixer or standing mixer, beat the whipping cream, chilled milk, cold water and vanilla flavor untill fluffy..
- Using a large serrated knife, slice a thin layer off the tops of the cakes to create a flat surface (if it is flat you can skip this step). Discard or crumble over finished cake. Place 1 cake layer on your cake stand or serving plate. Evenly cover the top with frosting. Top with 2nd layer and spread remaining frosting all over the top. I always use an icing spatula..
- Refrigerate cake for at least 30-60 minutes before slicing. This helps the cake hold its shape when cutting..
- .
- .
The "red" makes sense, but what about the "velvet" in this cake's iconic name? Food historians says it was a common description during the Victorian era, when the term described cakes that had an especially soft and "velvety" crumb. From the color to the crumb, this homemade red velvet cake is a dessert classic. A moist, classic Red Velvet Cake!! Made from scratch, and surprisingly easy when a few simple steps are followed - watch how to make it in the recipe video.